|
|
|
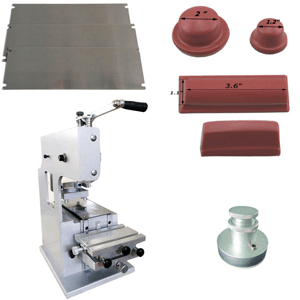
Pad Printing Making Plate Easy DIY Kit |
|
Pad printing is a printing process that can transfer a 2-D image onto
a 3-D object. This is accomplished using an indirect offset (gravure) printing
process that involves an image being transferred from the printing
plate (cliché) via a silicone pad onto a substrate (surface to be
printed). Pad printing is used for printing on otherwise impossible
products in many industries including medical,
automotive, promotional, apparel, electronics, appliances, sports
equipment and toys. It can also be used to deposit functional
materials such as conductive
inks, adhesives, dyes and lubricants. |
| Plate
making is vital import for pad printing, it
determines you printing quality, our this full set plate
making liquids and and machine can help you DIY you plate. |
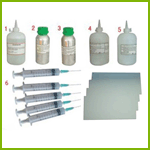
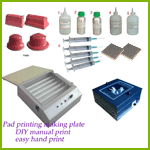
| 1-Cleaning
liquid 500ml /bottle(011036)
2-Photosensitive liquid
250ml /bottle(011007)
3-Developing liquid 250ml
/bottle(011008)
4-Etching liquid 250ml
/bottle(011009)
5-Stripping liquid
500ml/bottle(011010)
6-5 syringes(001060)
7-5 pieces of thin steel
plate(011005)
cliché-making |
 |
How the process works
 |
Step 1: Flooding
The image to be
transferred is etched into a printing plate commonly
referred to as a cliche'. Once mounted in the machine, the
cliche' is flooded with ink. The surface of the cliche' is
then doctored clean, leaving ink only in the image area.
As solvents evaporate from the image area the ink's
ability to adhere to the silicone transfer pad increases. |
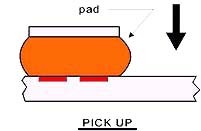 |
Step 2: Pick Up
The pad is positioned directly over the
cliche', pressed onto it to pick up the ink, and then
lifted away. The physical changes that take place in the
ink during flooding (and wiping) account for its ability
to leave the recessed engraving in favor of the pad.
|
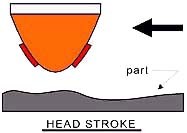 |
Step 3: Print Stroke
After the pad has lifted away from the
cliche' to its complete vertical height, there is a delay
before the ink is deposited on the substrate. During this
stage, the ink has just enough adhesion to stick to the
pad (it can easily be wiped off, yet it does not drip).
The ink on the pad surface once again undergoes physical
changes: solvents evaporate from the outer ink layer that
is exposed to the atmosphere, making it tackier and more
viscous.
|
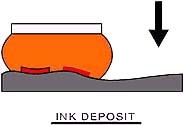 |
Step 4: Ink Deposit
The pad is pressed down onto the
substrate, conforming to its shape and depositing the ink
in the desired location. Even though it compresses
considerably during this step. a properly designed pad, in
fact, will never form a 0-degree contact angle with the
substrate; such a situation would trap air between the pad
and the part, resulting in an incomplete transfer.
|
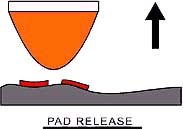 |
Step 5: Pad Release
The pad lifts away from the substrate
and assumes its original shape again, leaving all of the
ink on the substrate. The ink undergoes physical changes
during the head stroke and loses its affinity for the pad.
When the pad is pressed onto the substrate, the adhesion
between the ink and substrate is greater than the adhesion
between the ink and pad, resulting in a virtually complete
deposit of the ink. This leaves the pad clean and ready
for the next print cycle.
|
|
|
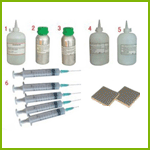
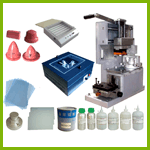
Items included:
1) 5 sheets cliché (011005)
2) 1 Cleaning liquid 500ml /bottle (011036)
3) 1 Photosensitive liquid 250ml /bottle(011007)
4) 1-Developing liquid 250ml /bottle(011008)
5) 1-Etching liquid 250ml /bottle(011009)
6) 1-Stripping liquid 500ml/bottle(011010)
7) 5 syringes(001060) |
|